 Loading... Please wait...
Currency Displayed in
- Home
- Pickup Tooling 2
Categories
Pickup Tooling 2
Pickup Tooling 2
STEP ONE
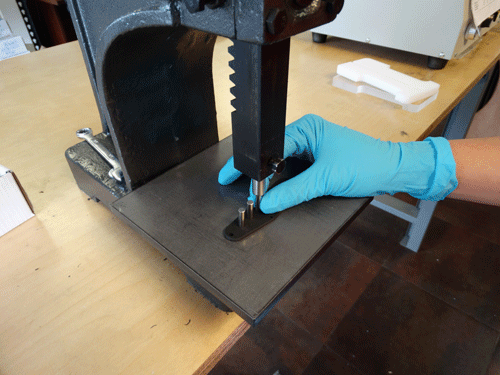
Top press your rod magnets being careful to press them square with the bottom flatwork.
Tone Kraft sells 3/8" stainless steel pins (or you can provide your own) that can be set in the 3/8" ram bore at the bottom of you ram. This pin can be used for top pressing your magnets into your bottom flatwork. Because this process requires a more manual approach to building than our pickup bobbin presses do, you will need to make sure that your magnets are as square as possible when top pressing them into your bottom flats. Pressing tight to the work surface below the pin will help straighten and correct any small deviations.
Your rod magnets should now be flush with the bottom of your flat. If you had excess material that needed to be removed, you may need to press the rod magnet lightly to achieve this.
*Important Note: Be sure to request to have your eyelets shipped loose and not installed when ordering your flatwork for best results. Eyelets can be easily installed when your bobbin is complete without any additional tooling required.
STEP TWO
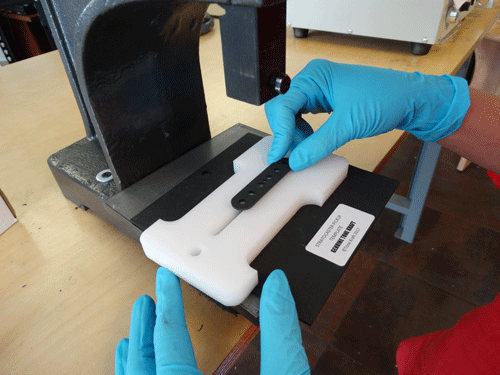
At this point you will now want to set your top flat. We achieve this by placing you bottom flatwork (with rod magnets installed) on a flat hard surface (6 X 6 X 3/8 steel plate is recommended). Lightly press your top flatwork onto the pickup to hold it in place while pressing. You only need to set it so that the highest rod magnets (if your pole pieces are staggered) are holding the top flat in place. The magnets should not be coming through the top flat, but rather the top flat should just be gently seated so that you can easily position it for pressing it with your arbor.
STEP THREE
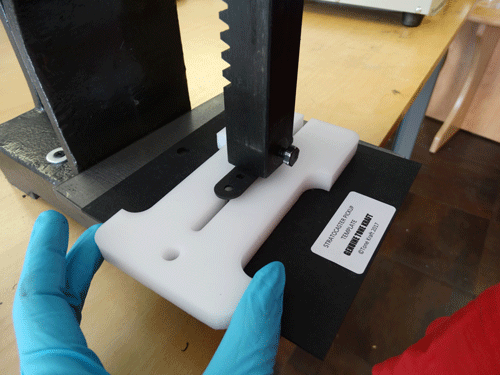
You will now want to place your bobbin on your arbor work surface inside the template provided. If you have only one arbor you will want to remove your 3/8" pin from the arbor bore at this point. Place your template with bobbin installed on your arbor work surface (6 X 6 X 3/8 steel plate is recommended), being sure to align the arbor with the center of your bobbin. You can now place your depth tool into the window of you bobbin.
STEP FOUR
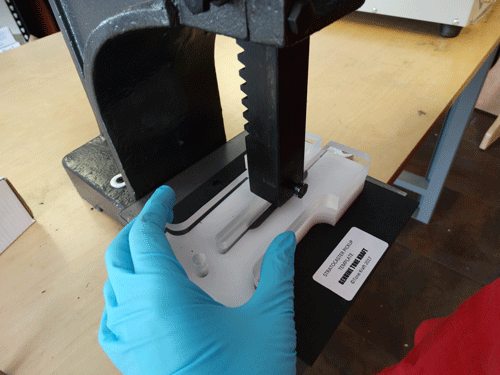
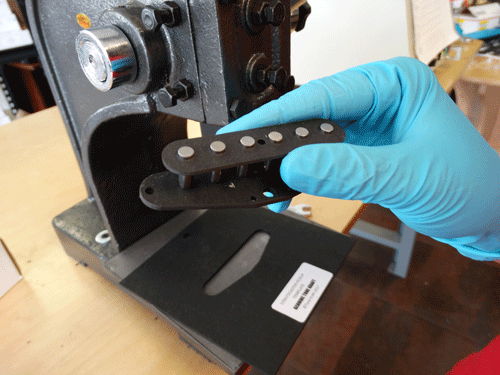
Positioning the clear press tool so that all the rod magnets are centered inside the tool, you can now press your top flat firmly to the depth tool. When completed, remove the depth tool carefully. Congratulations! You should now have a perfectly produced bobbin.
This method has been designed with cost being carefully considered without sacrificing quality. When using one arbor, you can complete the bottoms of all your bobbins first and then remove your pin from the ram bore and place all your tops on together. Also, our optional stainless steel pin can be used in a standard drill press as an alternative to the arbor press.
STEP FIVE
The next step would be to install the eyelets. You can use the simple method of simply turning the eyelet barrel up on a hard flat surface (6 X 6 X 3/8 steel plate recommended) and placing the eyelet hole of the bottom flat over the barrel and pushing down on the eyelet pressing the eyelet into the flatwork. Be careful not to push from the top flatwork, but rather from the bottom flatwork so as not to damage your bobbin.
< PREVIOUS
(Tone Kraft is in no way affiliated with Fender Musical Instruments.)


